Admin Guide
Custom Views
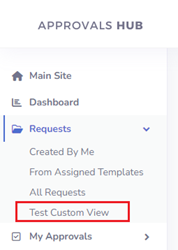
The Custom Views feature allows app administrators to create personalized views of request data, which can be made available to users based on specific permissions. These views are displayed in the Requests section of the left menu for users who have access to them.
Creating Custom View
Custom views can be created under the Administration → Custom Views section. The below animation explains how to create a sample custom view with filtering and custom column selection.
 To set up a new view, administrators will fill out the following details in the tabs provided:
Tab: General
- View Name: A text box where the administrator enters the name for the custom view.
- Who can see this view: A selection box that defines who can access this view in the Requests section. Supported options include:
- All Users - everyone with access to the app can see this view
- Selected User Roles - base on user role under Administration->Users
- Selected Groups - base on user group assigned to the users under Administration->User Groups
- Selected Departments - base on department assigned to the user
- Selected Users - access onlyfor specific users (accounts)
- View Context: A radio button with two options:
- Multi-Template: Allows viewing data across multiple templates.
- Single Template: Displays requests from a specific template, but allows displaying template-specific custom fields in data table.
- Data Scope: A radio button with three options:
- All Templates: Includes data from every template.
- Assigned Templates: Limits data to specific templates assigned to the user (Administration->Request Templates->edit->field 'Template Managers').
- From My Department: Limits data to requests from the user's department.
Tab: Data Filters
This tab allows the administrator to define filters that will display only records meeting specific criteria, such as a particular status.
Tab: Columns in Data Table
This tab allows the administrator to customize the data table view by selecting which columns to display. There are two lists:
- Available Columns: Lists all columns that can be added to the table.
- Selected Columns: Shows the columns currently included in the view.
To add a column, simply drag and drop it from Available Columns to Selected Columns. Columns can also be reordered by dragging and dropping them within the Selected Columns list.
Once configured, the custom view is available to users with the appropriate permissions under the Requests section of the left menu.