Admin Guide
General Settings
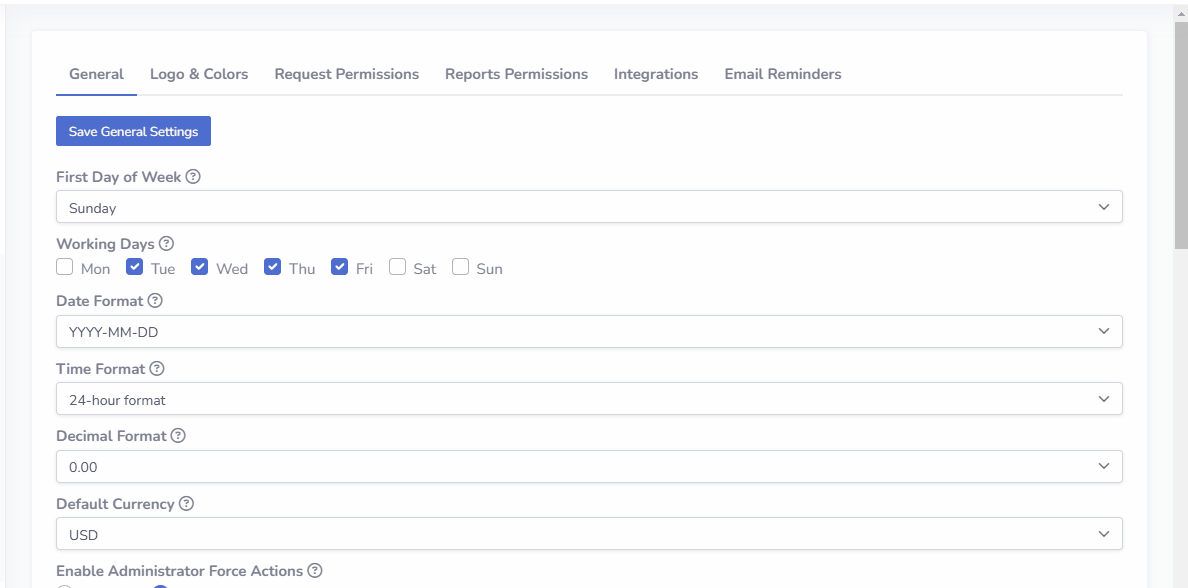
The General Settings section allows app administrators to configure foundational settings to align the app with organizational preferences. Customize options such as the first day of the week, working days, date and time formats, and the default currency to ensure the app meets your operational and regional requirements.
Navigating General Settings
Steps to adjust general settings
- Open view Administration->Settings in the left menu.
- Adjust settings to your needs
- Click button "Save General Settings" to confirm
Notices
- Don't forget to click button "Save General Settings" to confirm changes, otherwise changes are lost
- For more details about specific settings, hover your mouse over the help icon next to each option to display a tooltip with additional information
List Of General Settings
| Setting | Description |
|---|---|
| First Day of Week | Set the first day of the week for calendars (date picker) |
| Working Days | Select your standard workweek days. This setting is used to calculate the 'Completion Due Date' (if enabled in template settings). For instance, if 'Completion Due Date' is set to 'Due 2 working days after request submission,' non-working days are excluded from the due date calculation. |
| Date Format | Choose the format for displaying dates throughout the app. |
| Time Format | Select between a 24-hour or 12-hour time format |
| Decimal Format | Set the number of decimal places to display for amounts on expense sheets |
| Default Currency | Set the default currency for budget and financial data |
| Enable Administrator Force Actions | Allow administrators to use 'Force Approve,' 'Force Reject,' or 'Force Complete' options to override regular approval processes. |
| Request Title Field | Enable or disable the 'Title' field for requests. By default, field 'Title' is displayed in data tables as a summary of the request. |
| Task In-Progress State | Enables the 'Start Task' action and the 'In Progress' status option for tasks (by default there are statuses 'Pending' and 'Completed', without the ability to set up 'In Progress' state) |
| Integration List | Enable or disable export to the integration list (Administation → Settings → tab "Integrations"). |
| Budget Tracking | Enable the ability of budget allocations (list of budgets under Administation → Budgets" and option 'Budget Tracking' under request template settings (for templates with 'Expense Tracking' option enabled) |
| Sections On The Print Form | Select the sections to include when printing request forms. |
| Default View for Manager Role | Select the sections to include when printing request forms. |
| Default View for Administrator Role | Set the default view after opening the app for users with the Administrator role |
| Regular User Role Provisioning | This setting manages how the Regular User role is assigned to new users in the app. Auto provisioning - The "Regular User" role is the default, and no separate user entry is required for "Regular User" access. Registration under Administration → Users - Only users explicitly registered under Administration → Users will have access to the app. |
| Manager Source for Request Flow | These settings are used when 'Assign Stage To' in the request flow settings are setup to the value Requester's Manager. Get Manager from Microsoft 365 User Profile - The Manager is pulled from user Microsoft 365 User Profile defined by Microsoft 365 tenant admin, please make sure that each user has Manager(s) field filled out correctly in Microsoft 365 tenant settings. Set Manager(s) under Administration → Users - The Manager is pulled from user profile defined in the app (Administration → Users), please make sure that each user has Manager(s) field filled out correctly under Administration → Users in the app. |
| Department Tracking | Choose how department information is sourced: automatically from Microsoft 365 profiles, manually in-app under Administration → Users, or disable tracking. |
| Office Location Tracking | Choose how location information is sourced: automatically from Microsoft 365 profiles, manually in-app under Administration → Users, or disable tracking. |
| Number of Managers in User Profile | Set the number of entries displayed per page in data tables. |
| Default Page Size in Data Tables | Set the number of entries displayed per page in data tables. |
| Link to the Main Site (left menu) | Choose the main site link ('Main Site' in the left menu'). Select 'Parent SharePoint Site' to link to the primary SharePoint site (where the app is installed), 'Custom URL' to specify a unique URL, or 'Disabled' to remove the main site link. |