Admin Guide
Request Templates
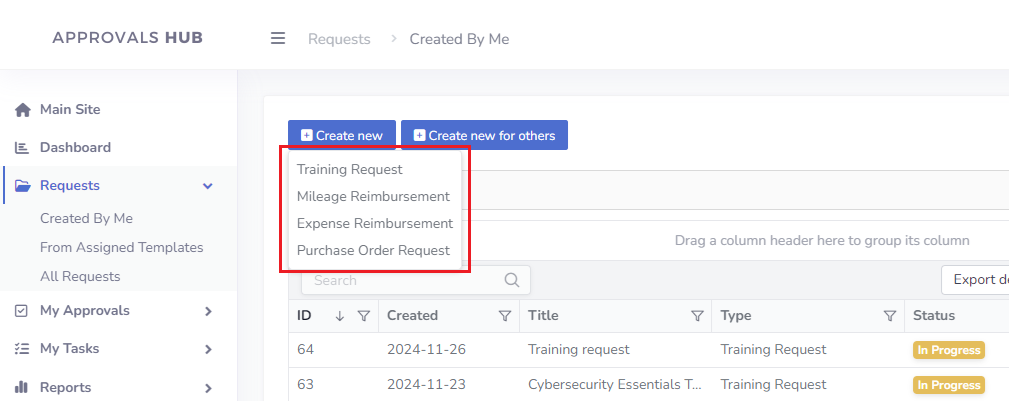
Request templates provide flexibility and customization for handling various types of requests. The app administrator can create and manage a wide range of request templates, such as Training Requests, Purchase Order Requests, or Expense Reimbursements. Each template comes with custom forms, flow settings, and permissions tailored to meet specific business needs. When creating a new request, users select the appropriate template from a list.
Creating a New Request Template (Basic Configuration)
To create a new request template, follow these steps:
- Open view Administration->Request Templates in the left menu.
- Click the button "Create New"
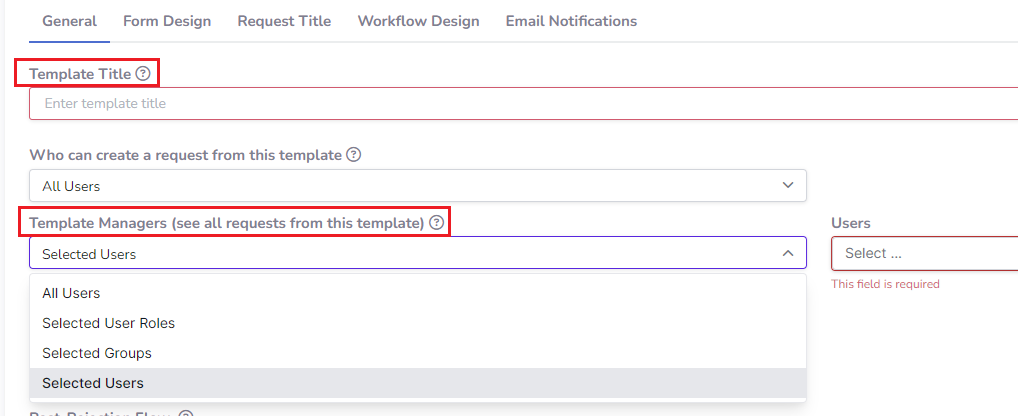
- Under tab "General", fill out two mandatory fields: Request Title and Template Managers (users or groups who can view and manage all requests created from this template in the built-in report under Requests → From Assigned Templates Additionally, you can control template visibility in setting Who can create a request from this template.
- Click on the tab "Form Design" and add at least one item to the form by using drag and drop from the designer toolbar. If option 'Request Title' is enabled under Administration->Settings (which is the default setup), please fill out also Field Unique Name, which will be required in the next configuration steps.
- Click on the tab "Request Title", click the button "Insert Form Variable" and select a field from the list that will serve as a request title.
- Click on the tab "Workflow Design" and adjust approval path to your needs

- Click on the tab "Email Notifications" and adjust email notifications to your needs (e.g. disable specific notifications or add extra variables)
- Click on the button "Save" to save changes

Form Designer Guide
Design Form Layout
In the Form Designer, you will find two toolboxes in the left menu: Forms and Layout.
- Forms: Contains elements related to form functionality, such as Text Input, Number Input, Choice etc.
- Layout: Allows you to control the design and structure of the form, affecting both the screen display and the printed form. The layout items include:
- Header Bar: Typically used for titles or descriptions at the top of the form.
- Label: Used for creating labels for form fields.
- Paragraph: Adds text for explanations or additional instructions.
- Line Break: Adds space between items, helping to visually separate sections of the form.
- Two Column Row: Organizes content into two columns for a more balanced form layout.
- Three Column Row: Organizes content into three columns, ideal for forms with multiple fields.
- Image: Allows you to insert images into the form layout, such as logos or other relevant graphics.
Each layout item includes the property Show Only On The Print Form, which allows you to display it only when the form is printed. This is particularly useful for items like custom logos or other information that should not appear on the digital form but is needed on the printed version.
Additionally, you can easily rearrange the layout of the form by clicking the move icon next to any item. This allows you to move items to the top or bottom of the form layout to adjust the order as needed.
Using Field Properties
To control the properties of each form item, click on the edit icon next to the item. This allows you to modify various settings, including:
- Read Only: This property allows you to make the field read-only, preventing users from editing the field value.
- Conditional Visibility: This property enables you to set conditions that determine when a form item should be visible. For example, you can show or hide fields based on the value of another field.
- Custom Permission Schema: This feature allows you to define custom permissions for a specific field, ensuring that only certain users or groups can view or edit that field.
- Source: Source of data for choice fields
Once you click the edit icon, a settings panel will open, where you can adjust these properties according to your needs. After making the necessary changes, save your settings to apply the changes to the form.
Adding Data Tables
Tables are a great way to store tabular data, such as an IT equipment list, order details, or any other data that requires a grid-like structure. To add a table to your form, follow these steps:
- Click on the Data Table icon in the left toolbar. This will add a table to your form.
- Once the table is added, you can customize it by adjusting the columns. To add a new column, click on the Add New Column button.
- Repeat this step to add as many columns as needed for your table. You can also adjust the column names, data types, and other properties as necessary.
Workflow Designer Guide
Design The Workflow Path
As an app administrator, you have the flexibility to design workflows using different flow types:
- Sequential Stage: In sequential stages, each task or approval is processed one by one. The next stage in the workflow waits until the previous stage is completed. This is useful when tasks need to be completed in a specific order.
- Parallel Stage: In parallel stages, tasks or approvals are processed simultaneously, allowing multiple actions to occur at the same time. This can help speed up the workflow when tasks do not depend on one another.
- Combination of Sequential and Parallel Stages: You can also design workflows with a combination of sequential and parallel stages, providing even more flexibility for complex approval paths and task assignments.
This flexibility ensures that you can design workflows that match the unique approval and task requirements of your organization, managing the process efficiently and effectively.
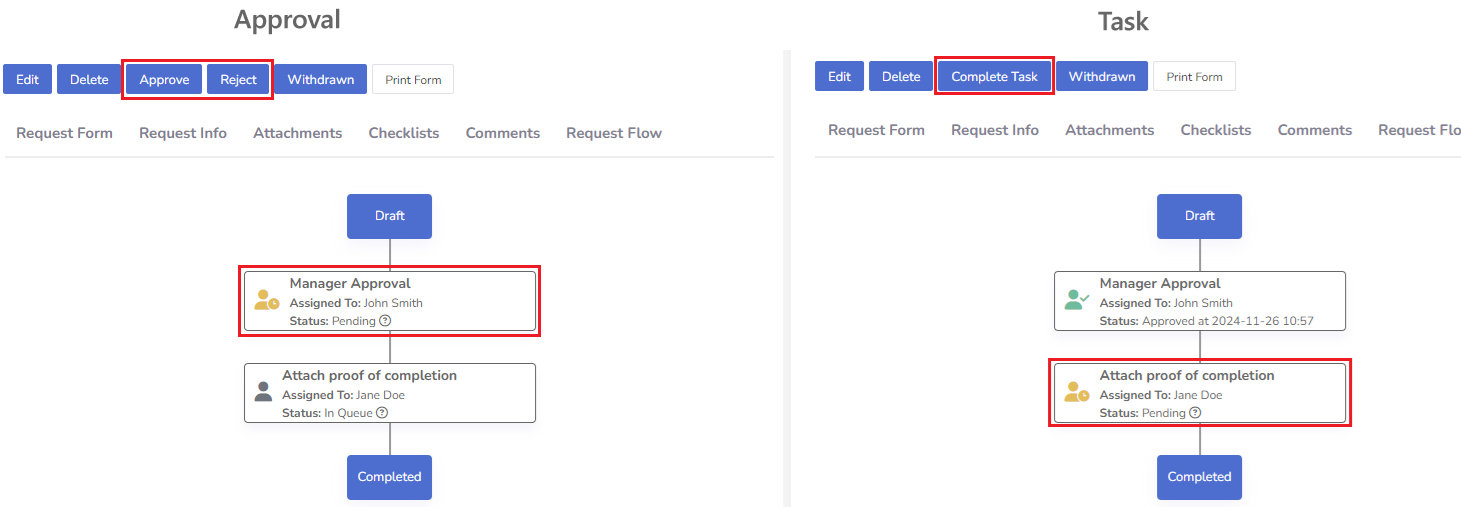
Task and Approvals
Workflows can consist of a set of approvals and tasks, allowing organizations to design processes that reflect their specific requirements. For example, in a training request workflow, the approval might include multiple stages, and once the request is approved, the final task could require the requester to upload proof of certification. This structure ensures all necessary steps are completed before the process is finalized.
Users can view their pending tasks under My Tasks → For My Completion and their pending approvals under My Approvals → For My Acceptance.

For approvals, users can choose between two actions: 'Approve' or 'Reject.' For tasks, the available action is 'Complete Task,' with an optional 'Start Progress' feature that can be enabled in the app settings.
The app administrator can select a flow item and choose the Stage Type to define whether the stage is an Approval or a Task:.
- option Approval: An approval stage requires a designated user or group to review and either approve or reject the request. The workflow will proceed based on the decision made at this stage.
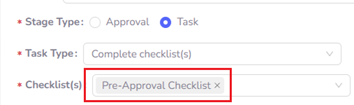
- option Task: A task stage requires a specific action to be completed, such as filling out a form or completing a checklist. For task stages, the administrator can define the Task Type:
- Complete Form: The user is required to fill out a specific form item. For example, they might need to attach medical documentation or provide additional details.
- Checklist: The user must complete a checklist. To use this task type, the administrator must first enable and create the checklist(s) for the specific template.
- No Action Required: This task type indicates that no action is required from the user at this stage, allowing the workflow to move forward without any input.

Flow Item Assigment
The app administrator can configure the assignment of each flow item by selecting the item and choosing the Assign Stage To option. This allows the administrator to define the assignment rule for the flow stage.
The Assign Stage To field offers the following options:
- Requester Self-selection on the Create Form: The requester selects the assigned user directly on the request form (a separate tab called 'Flow Assigments'). This option provides flexibility, allowing the requester to determine who will be responsible for the task.
- Requester's Manager from M365 User Profile: The assignee (manager) is automatically taken from the requester's Microsoft 365 User Profile.
- Requester's 1st/2nd/3rd/4th Line Manager from User Profile: The assignee (manager) is automatically selected from the user’s profile in the app (under Administration > Users). This allows for more specific hierarchical assignments, depending on the level of manager needed.
- Selected Group: The item is assigned to a specific group, allowing for a team or department to handle the task.
- Selected User: The item is assigned to a specific user, providing a direct assignment to an individual.
- Requester: The item is assigned to the requester themselves, meaning the person who initiated the request will handle the task.
By selecting the appropriate assignment rule, the administrator can ensure that each stage in the workflow is assigned to the right person or group, streamlining the approval and task process.
Expenses Tracking
Creating Expenses Table
To enable the expense tracking feature in your request template, follow these steps:
- Switch the Expenses Tracking option under the general template settings.
- Click on the tab 'Form Design'
- Click on the the 'Expense' table properties
- Adjust table to your needs (for example, add new custom fields)
- Click on the tab 'Subtotal Formula' and adjust formula. You can test changes by using 'Preview' mode.
Enabling Multiple Currencies Tracking With Automatic FX Conversions
To enable the multiple currencies tracking feature in your request template, follow these steps:
- Switch the Expenses Tracking and Use Multiple Currencies options under the general template settings.
- Click on the tab 'Form Design' to make sure that expense table was added, you should see columns 'Expense Date', 'Expense Amount', and 'Currency' designed for currency tracking.
- Click on the tab 'Subtotal Formula' and test the formula with multiple currency tracking by using 'Preview' mode
Notices
- For automatic FX conversions to function properly, ensure all required fields (Expense Date, Expense Amount, and Currency) are completed.
- The 'Exchange Rate' field, used for automatic FX conversion, is populated only when creating or editing a spreadsheet and applies exclusively to today’s and past dates.
Creating Subtotal Formulas
The Subtotal Formula Designer in allows you to define custom calculations for subtotals using a powerful formula parser. This feature supports conditional formulas, similar to those in Microsoft Excel, enabling dynamic and flexible calculations.
Key Features
- Custom Formulas: Create your own formulas for subtotal calculations using standard arithmetic operators (
+,-,*,/). - Conditional Logic: Apply conditional logic to your formulas using the
iffunction. - Dynamic Values: Reference fields or variables from your form to include in calculations.
Writing Formulas
You can use formulas similar to Excel. Here's a quick guide:
1. Basic Formula Example:
= {Field1} + {Field2}
This adds the values of Field1 and Field2.
2. Using the IF Function:
= if(Condition, Value_if_True, Value_if_False)
Components:
- Condition: The logic you want to test (e.g.,
{Field1} > 100). - Value_if_True: The result if the condition is true.
- Value_if_False: The result if the condition is false.
= if({Rate}='Bussiness Purpose',{Miles}*0.67,{Miles}*0.21)
3. Referencing Fields:
Use the exact names of form fields enclosed in curly braces, such as {FieldName}.
= {Subtotal} * 0.1
Supported Functions
- Arithmetic: Add (
+), subtract (-), multiply (*), divide (/). - Conditional Logic:
IF(condition, true_value, false_value). - Grouping: Use parentheses to control the order of operations.
= ({Field1} + {Field2}) * {Field3}
Common Use Cases
1. Calculate Taxes:
= {Subtotal} * 0.1
2. Discount Application:
= IF({TotalExpense} > 1000, {Subtotal} * 0.9, {Subtotal})
This applies a 10% discount if the total expense exceeds $1,000.
3. Expense Categorization:
= IF({ExpenseType} = "Travel", {Amount} * 0.5, {Amount})
Tips
- Double-check field names to ensure accuracy
- Test your formula with sample data to validate results.
Checklists
Checklists allow you to stay organized and on track with customizable lists that ensure no detail is overlooked.
To enable the checklist feature in your workflow, follow these steps:
- Enable the Checklists option under the general template settings.
- Create a checklist under the Checklist tab in the template settings.
There are two types of checklists that can be used in your workflow:
- Workflow Task: This type of checklist can be assigned as a task under the Workflow Design tab. These checklists are filled out during task completion, and they are a part of the workflow process, ensuring that the required items are checked off as the task progresses.
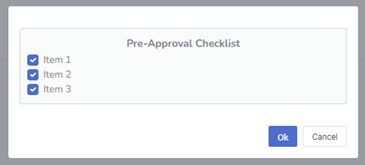
- Requester Fill-Out: This checklist is filled out by the requester after they click the Submit button. It allows the requester to complete additional details or requirements before final submission of the request.
Here is a sample checklist displayed for the user during request submission. The request cannot be submitted if all checklist items are not selected, ensuring that all required items are completed before proceeding.
By enabling and setting up checklists, administrators can ensure that necessary tasks and information are tracked and completed at the appropriate stages of the workflow.