Admin Guide
Email Reminders
You can configure email reminders to run in two scenarios using a Power Automate flow connected to the integration SharePoint list (Administration → Settings → tab "Integrations"):
- Reminders to approvers about pending approvals.
- Reminders to requesters about unsubmitted (Draft) timesheets.
This section provides a step-by-step guide on creating a sample Power Automate flow to implement these reminder scenarios effectively.
Configuring reminders to approvers about pending approvals
Below is an video that guides you through the entire process of configuring the Power Automate flow for email reminders to approvers (click the 'play' icon to start watching).
Below are detailed steps to configure Power Automate flow
- Open Power Automate service, for example by using this link
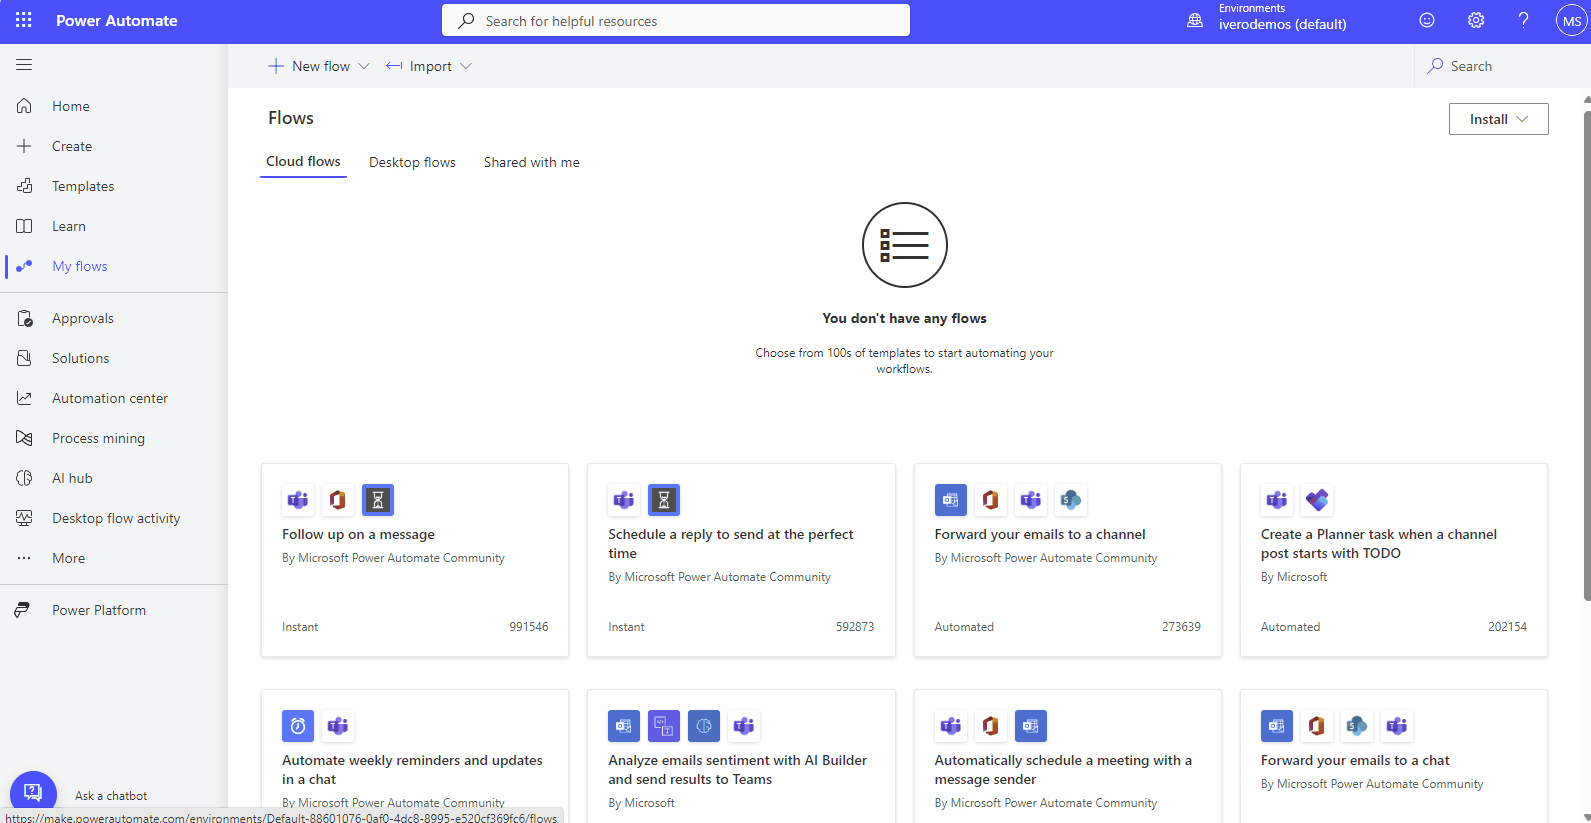
- Create new flow and select "Scheduled cloud flow" as flow type
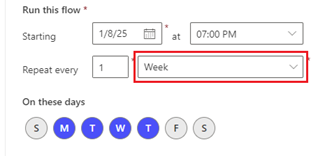
- Select how often flow runs (e.g. once a day at 7. P.M or once a week on specific days)
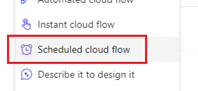
- Click '+' icon and add new action "SharePoint - Get items"
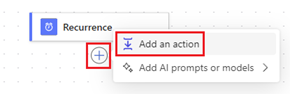
- Click on the "Get Items" component and select two params:
Site Address: select SharePoint site where the app is installed
List Name: select TimesheetHubIntegrations
If you cannot find Site URL in drop-down list, please perform following steps:
a) open view Administration → Settings → tab "Email Notifications&Reminders" in the app
b) expand tab "Setting Up Email Reminders"
c) click button "Copy Site URL to Clipboard"
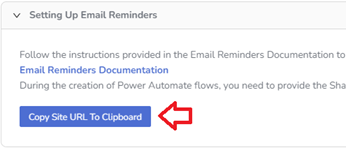
d) use option 'Enter custom value' under 'Site Address' and paste URL from the clipboard

- Use 'Filter query' to filter SharePoint list items on the integration list.
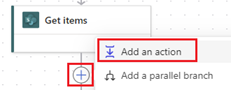
- Click '+' icon and add new component "Apply to each"
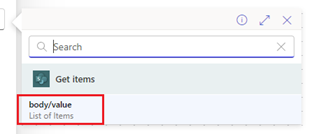
- In field 'Select an output from previous steps', click on the thunder icon and select option 'body/value' (from the "Get Items" component)
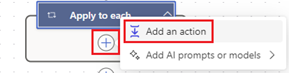
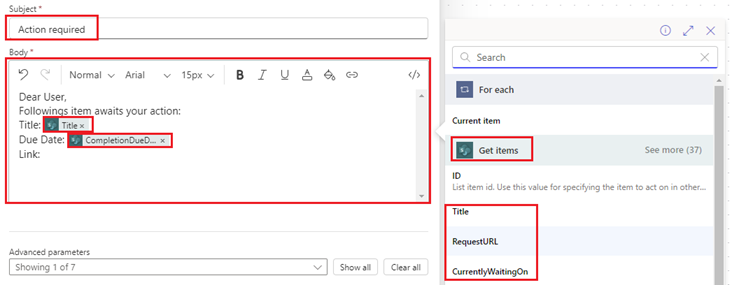
- Click '+' icon inside "Apply to each" and add new component "Office 365 Outlook - Send an email (V2)"
- Click on the component "Office 365 Outlook - Send an email (V2)"
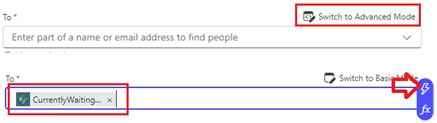
- Under 'To' field click on 'Switch to Advanced Mode'.
- Click on the 'thunder' icon and select field CurrentlyWaitingOn from the list
- Fill out fields "Subject" and "Body". Use the 'thunder' icon to enter variables from 'Get Items' component like Title,CompletionDueDate or RequestURL
- Click button "Save" to save the flow

- Now you can test the flow by creating and submitting requests in the app and check if email reminder is delivered.
Before testing, please make sure that there are items in the app that meets criteria (e.g. Status eq 'In Progress').
Message delivery time may vary slightly, i.e. sometimes Power Automate delivers messages immediately, and sometimes it takes even a few minutes.

Status eq 'In Progress'
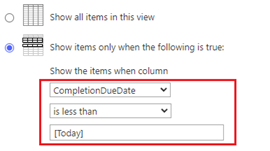
You can also create a custom SharePoint list view on the 'TimesheetHubIntegrations' list (refer to this sample guide). For instance, you can create a view named 'Overdue Items' that filters and displays only the overdue items by applying a filter on the 'CompletionDueDate' column
 and use this view as a filter in the 'Get Items' component (option 'Limit Columns by View')
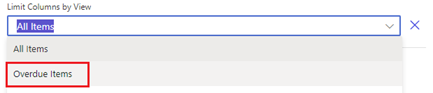
Configuring reminders to requesters about unsubmitted (Draft) timesheets
Below is an video that guides you through the entire process of configuring the Power Automate flow for email reminders to requesters (click the 'play' icon to start watching).
Notices
By default, emails are sent from the Office 365 account of the user who runs the flow. For testing purposes, this is usually sufficient. However, in production, it is recommended to send emails from a shared mailbox created specifically for this purpose (e.g., no-reply@yourdomain.com). A shared mailbox up to 50 GB does not require a separate license, making it a cost-effective option for production scenarios. You can find step-by-step instructions on how to create and configure a shared mailbox in this guide.