Admin Guide
Users
The user creation process in the app is managed through the Administration -> Users section, where all users must be registered. There are different methods available for provisioning user metadata (Manager, Department, and Office Location). These details can either be pulled from the Microsoft 365 User Profile or manually set within the app.
Metadata Provisioning Options Before creating users, please open view Administration->Settings and select metadata provisioning options for user object (manager(s),optionally departments and office locations).
Manager(s)
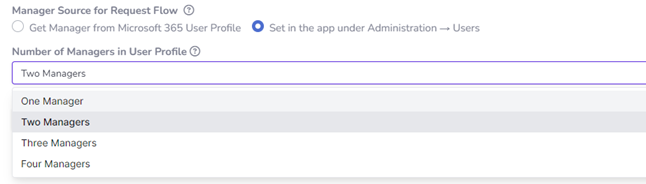
There are two provisioning options Administration->Settings, controlled by setting 'Manager Source for Request Flow'- Get Manager from Microsoft 365 User Profile: The app will automatically fetch the user's manager information from the Microsoft 365 User Profile, ensuring up-to-date manager details.
- Set in the app under Administration -> Users: Administrators can manually define the user's manager within the app. There is an option to set up to 4 managers for each user.
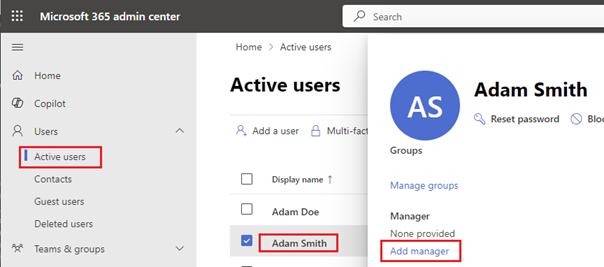
 In the case of option 'Get Manager from Microsoft 365 User Profile', you can assign a manager to a Microsoft 365 User Profile via Microsoft 365 Admin Center, in the Microsoft Entra ID Admin Center (formerly Azure Active Directory) via, Exchange Admin Center or PowerShell.
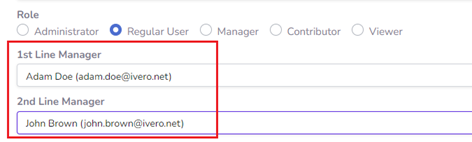
 In the case of option 'Set in the app under Administration -> Users', you will see the field to define manager(s) during user entry creation.
Departments and Office Locations
Departments and Office Locations are optional. Enabling these options allows you to filter request by department of office location (visible below) or create custom views only for specific department(s) or office location(s). Departments and Office Location provisioning is controlled through two options in Administration > Settings: 'Department Tracking' and 'Office Location Tracking'.
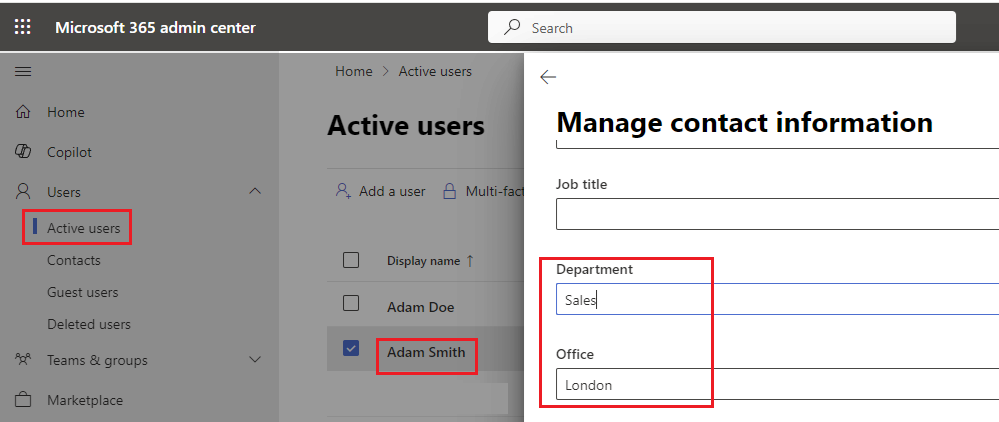
 In the case of option 'Get from ... Microsoft 365 User Profile', you can assign a department or office location to a Microsoft 365 User Profile via Microsoft 365 Admin Center.
 In the case of option 'Set in the app under...', you will see new dictionaries under Administration section, that allows creating new entries.
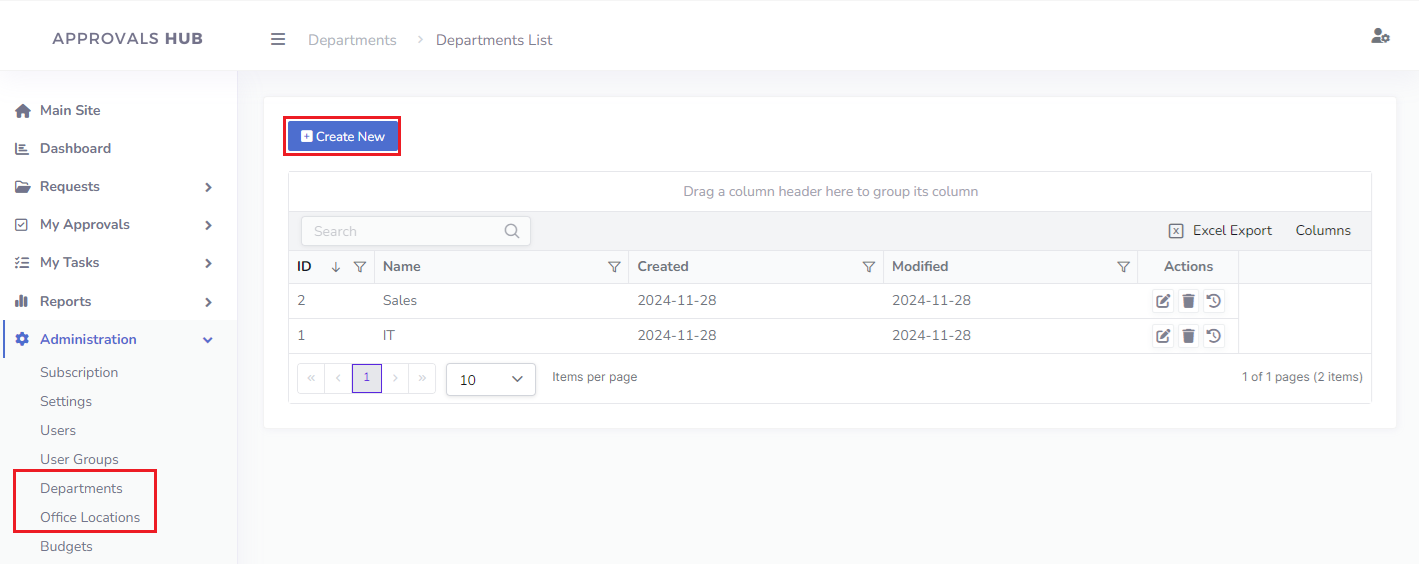 Once department and office location dictionary are created, you can assign the department and/or office location on the user creation form (Administration->Users)
Adding New Users
Steps to create new user(s)
- Open view Administration->Users in the left menu
- Click on the button "Create New" and select one of two options 'Create one' or 'Create in bulk'
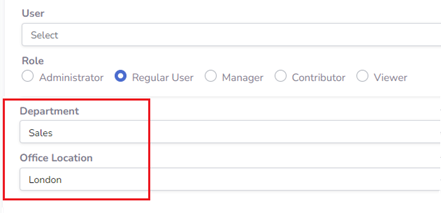
Adding Users In 'Single' Mode
To create user entry in this mode, please fill out fields 'User', 'Role' and optionally Managers, Department and Office Location (depending on provisioning options) and click button "Save" to confirm.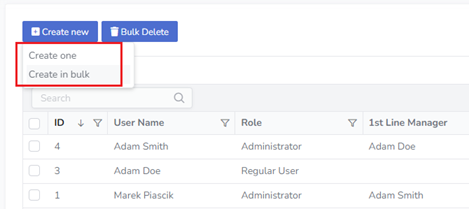
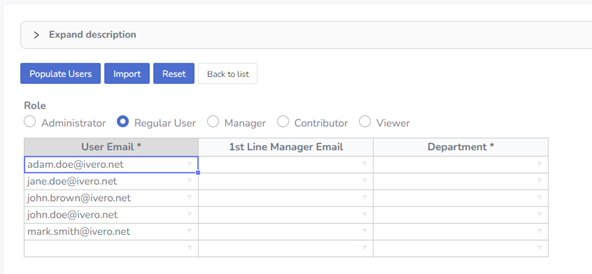
Adding Users In Bulk Mode
This feature offers two options for creating users:- Manual entry in the spreadsheet mode - click button "Populate Users" and expand drop-down lists to select Manager(s) or optionally Department and Office Location
- Importing from Microsoft Excel spreadsheet, described in detail in this article
Notices
- The list of users is pulled by the app directly from Microsoft Entra ID (formerly Azure Active Directory) using the MS Graph API, ensuring that the user data is always up-to-date and synchronized with your organization's directory.
Automatic Regular User Provisioning
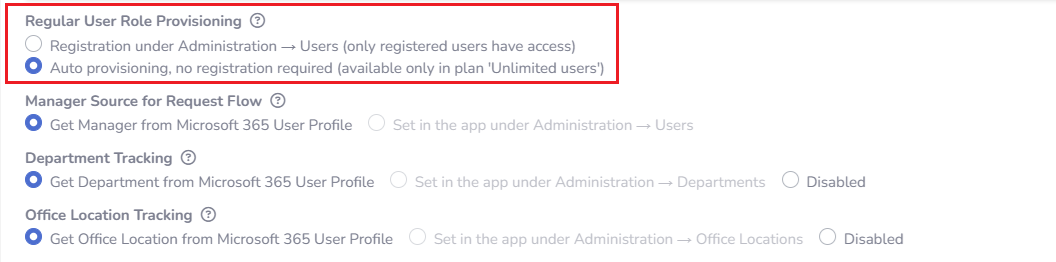
For large organizations using the 'unlimited users' subscription plan, there is an option to set up automatic provisioning for regular users. In this mode, there is no need to create regular user entry under Administration->Users in the app (only users with Administrator, Manager, Viewer or Contributor roles).Steps to enable this option:
- Open view Administration->Settings in the left menu
- Change setting 'Regular User Role Provisioning' to the value 'Auto provisioning, no registration required
- Click button 'Save General Settings' to confirm changes
Notices
- 'The 'Automatic Regular User Provisioning' mode is available only with the 'unlimited users' subscription plan . For other plans with a limited number of users, it is necessary to define the users who will have access under Administration->Users in the app
- In this mode, manager, department and/or office location must be setup in the Microsoft 365 User Profile
Summary
- All app users must be registered under Administration -> Users within the app (unless you have enabled 'Automatic Regular User Provisioning' mode)
- User metadata (Manager, Department, Office Location) can either be sourced from the Microsoft 365 User Profile or set manually within the app.
- The Administration > Settings section allows for controlling the source of the Manager, Department, and Office Location information.
- For simple approval paths, selecting Get Manager from Microsoft 365 User Profile will typically suffice, as it pulls the 1st line manager automatically.
- For more complex organizational structures requiring approval from 2nd or 3rd line managers, administrators can define up to 4 managers manually under Administration > Users.