What to know before you start
1.The integration list must be enabled inside the app by app admin (admin must have enough SharePoint permissions to create SharePoint lists).
2.Export operation works only for new requests (doesn't work backward, so just after creation list is blank).
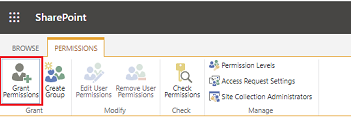
3.The export operation is performed in the context of SharePoint users who perform a particular action (i.e. approve,reject etc), please make sure that your users have "Edit" permission to the export list:
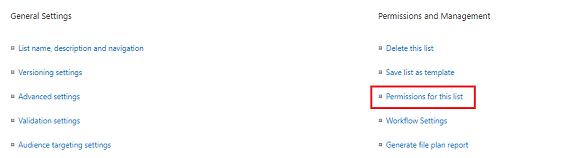
Step 1) Enter export list and click "List Settings"

Step 2) Click "Permission for this list"
Integration examples
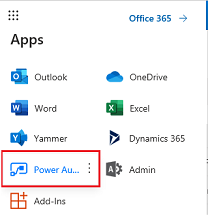
Link to Power Automate can be found under Office 365 app launcher. Here is more info about Power Automate.
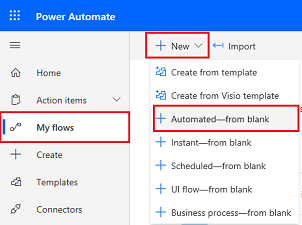
Step 1) Click on My flows=>New=>Automated from blank
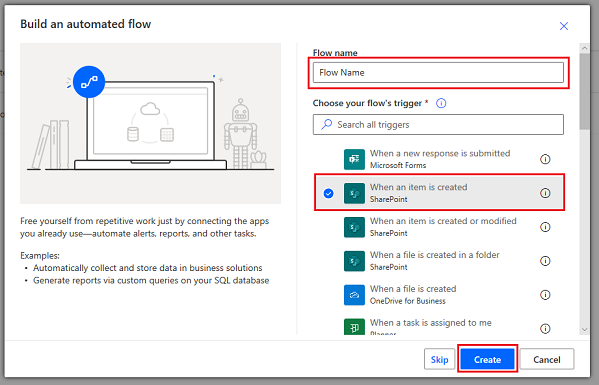
Step 2) Enter flow name, type "SharePoint" in search box and select trigger "Sharepoint - when an item is created"
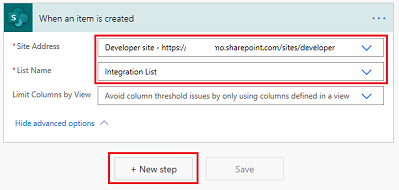
Step 3) Copy&paste Sharepoint List URL and integration list name, click "+ New step"
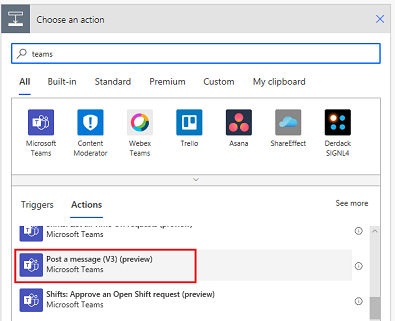
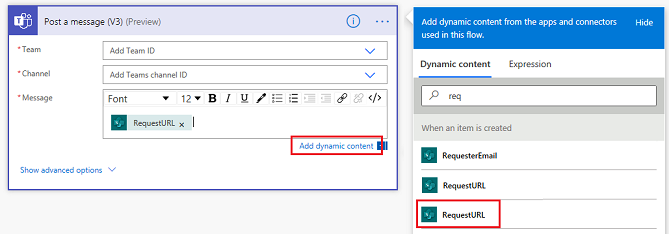
Step 4) Select Microsoft Teams action - "Post a message (V3)""
Step 5) Enter TeamID and ChannelID, use dynamic fields from list such as RequestURL,RequestID or Title.
Afterward, click "Save" to save flow.
Link to Power Automate can be found under Office 365 app launcher. Here is more info about Power Automate.
Step 1) Click on My flows=>New=>Automated from blank
Step 2) Enter flow name, type "SharePoint" in search box and select trigger "Sharepoint - when an item is created"
Step 3) Copy&paste Sharepoint List URL and integration list name, click "+ New step"
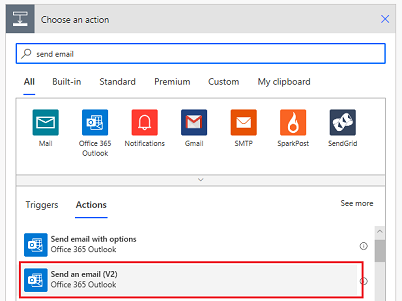
Step 4) Select action "Office 365 Outlook - Send an email (V2)"
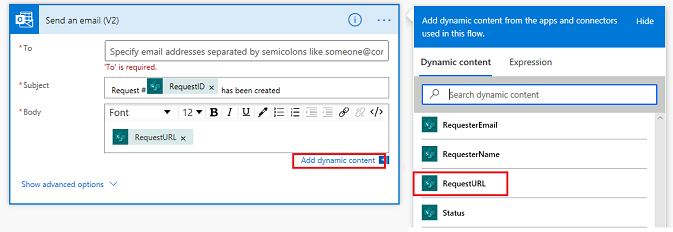
Step 5) Fill To/Subjest/Body by using Sharepoint list fields and click "Save" to save the flow
The List Web Part allows you to view tabular data on Sharepoint web page. Below are steps to add Web Part.
Step 1) Click "Edit" (you need to have required permissions to see edit option)

Step 2) Click Insert=>Web Part=>Apps, select list and then click "Add" to add webpart.

Power BI is a suite of business analytics tools to analyze data and share insights, here is more info.
Below are steps to add Sharepoint List as data source for Power BI.
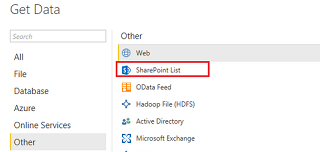
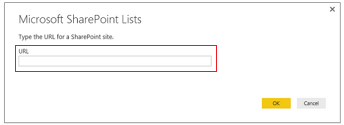
Step 1) Click on Get Data=>Other=>Sharepoint List
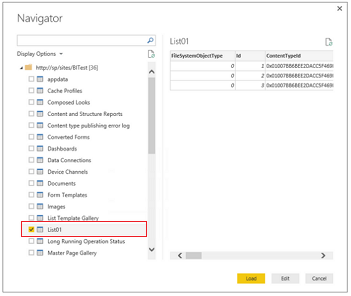
Step 2) Copy&paste Sharepoint List URL and click "Ok"
Step 3) Select Sharepoint List and click "Load"