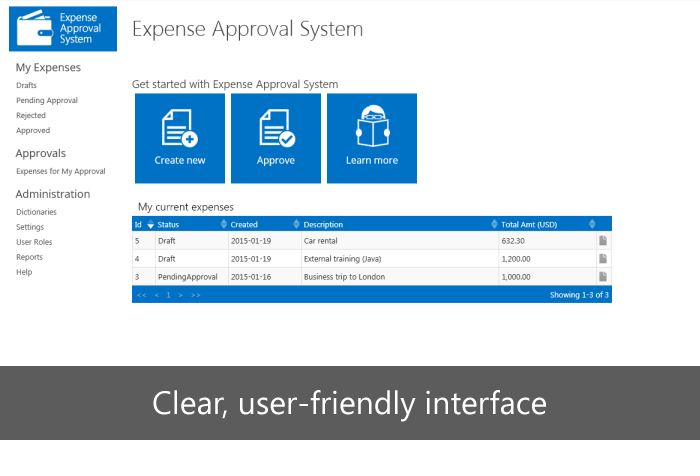
The Expense Approval System is a simple expense management software system, that streamlines and automates the workflows associated with creating, approving and controlling expense claims.
- Fully Functional Trial: Explore all the features with a no-credit-card-required trial.
- Secure Data Storage: All your data is stored on your SharePoint tenant.
- Simple Pricing Model: sold as lifetime license for unlimited users (one-time fee, not per user, not per year).
- Free Updates & Support: Stay up-to-date with the latest updates and receive free expert support.
Pricing
Lifetime License
USD
399
one-time fee
- • App updates
- • App support (No limit for support tickets)
- • Access to all app features
Product FAQ
After successful installation, the app is located on the SharePoint Site Contents.
First, please use one of below methods to get an app shortcut.
Method 1) Enter the app (first page) and copy full URL from the browser's address bar (with all parameters like SPHostUrl etc.), below is example:
https://iverodemo-c5948d2992c3d6.sharepoint.com/ExpenseApprovalSystem/Pages/Default.aspx?SPHostUrl=https%3A%2F%2Fiverodemo%2Esharepoint....
Method 2) Enter the app (first page), copy URL from the browser's address bar and remove all characters after app name, below is example:
https://iverodemo-c5948d2992c3d6.sharepoint.com/ExpenseApprovalSystem/Pages/Default.aspx?SPHostUrl=https%3A%2F%2Fiverodemo%2Esharepoint....
Required parameters will be automatically added by SharePoint.
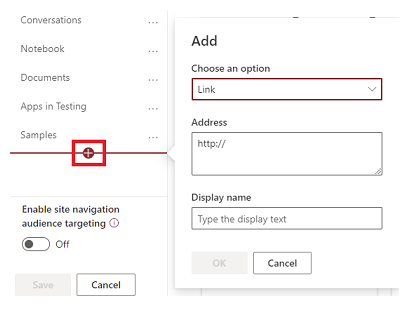
Pin app to the SharePoint Site menu
Step 1) Go to the SharePoint SiteStep 2) Click "Edit" on left or top SharePoint menu and add link to the app
Details are described in this document, steps are different depends on the SharePoint UI type (classic view/modern view)
Pin app to MS Teams as a new tab
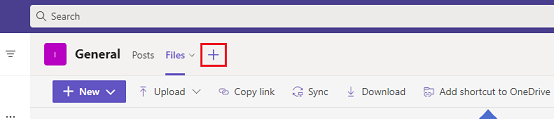
Step 1) Open MS TeamsStep 2) Click "+" icon to add a new tab
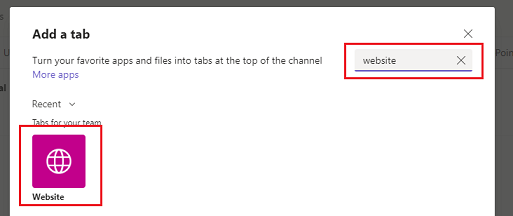
Step 3) Type 'website' in the search box to find an item "Website"
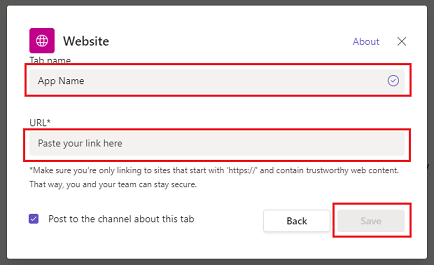
Step 4) Enter tab name, copy&paste above app URL (Method 1 or 2) and click Save button
Pin app to the Office 365 app launcher
You can add custom tile to the app launcher under Office 365 Admin Center->Settings->Organization profile page.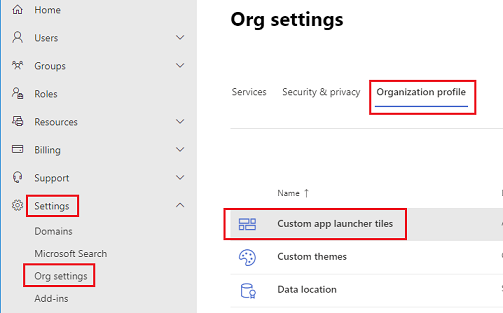
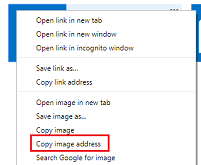
Details are described in this document. To get logo URL required to create new tile on app launcher you can click right mouse button on app icon (SharePoint Site Contents) and select "Copy image address"
App is 100% SharePoint-hosted - all data is stored securely on the customer's SharePoint environment.
App's data is never leaving your SharePoint env, we don't have access to your data and we never see it.
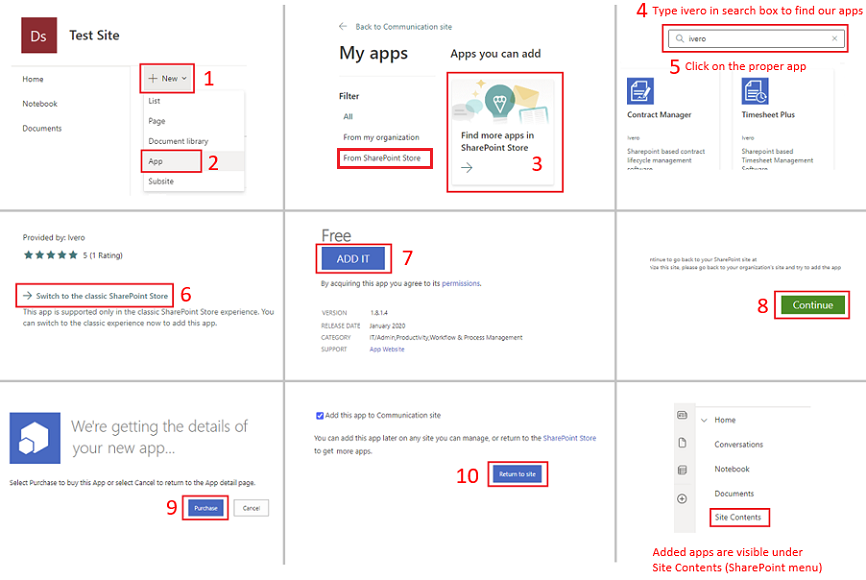
You can download the fully functional trial version from the SharePoint Store, which is explained step by step in the above illustration.
If you have problems with app installation, please read the question "I cannot install SharePoint app on my SharePoint Site" from our Technical FAQ.
The Expense Approval System workflow contains four "states": Draft, Pending Approval, Approved and Rejected.
Please see below for a step by step guide to completing the expense approval process.
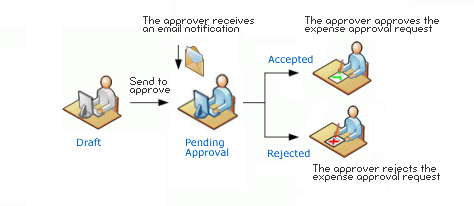
1. A user creates a new expense approval request.
2. The user submits the request for approval ("Send to approve" button).
3. Before approval of the expense request by an approver, the user can make changes to the expense request form.
4. The approver receives an email notification of the request and reviews the expenses.
5. The approver approves or declines the expense approval request.
6. If the approver approves the expense approval request, the process is complete.
7. If the approver rejects the expense approval request, the user must edit and resubmit the request, until the approver gives final approval.
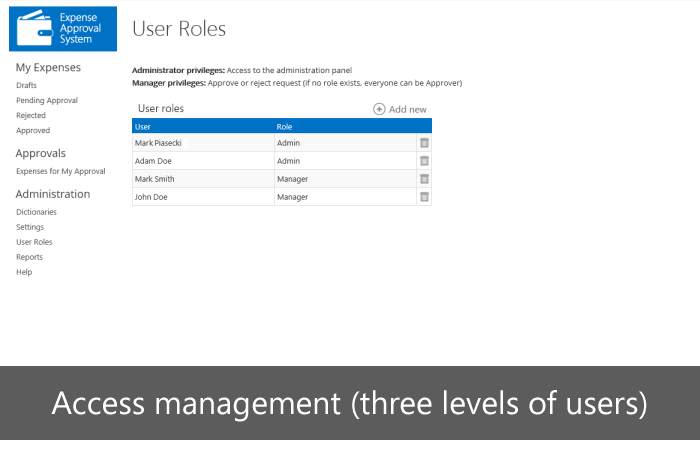
As Administrator:
1. Configure Dictionaries (section Administration->Dictionaries)
2. Configure display settings (section Administration->Settings)
3. Assign Manager and Administrator roles (section Administration->User Roles ). There is no need to assign regular User role, because this role is given by default -every user with access to the Sharepoint parent site (where the app is installed) also has access to this app as regular user.
As Regular User:
1. Click "Create new" tile on the main page and submit request.
There is no need to assign regular User role, because this role is given by default - every user with access to the SharePoint parent site (where the app is installed) also has access to this app as regular user.
App update process is described here and also on our Technical FAQ, question "How to update SharePoint app?"
User list is pulled from SharePoint User Information List (built-in SharePoint feature, here is more info)
SharePoint user is added to the User Information List after first login to the SharePoint Site.
After first login, user will be visible in the user's drop-down list.
We cannot extend trial period remotely, because app is SharePoint-hosted and our company doesn't have access to the customer's SharePoint env., however you can uninstall an app and install it again to "reset" 14-day period. (this operation removes all app data and configuration).