Comprehensive ticketing system for Office 365

Features

Products comparison

Feature Service Desk Pro Help Desk Plus
Help Desk Workflow
Role-based access control
Ticket templates with custom fields
Built-in e-mail notifications
Satisfaction survey
Reporting with export to Excel
Integration module
Knowledge Base
Workflow Editor (custom workflows)
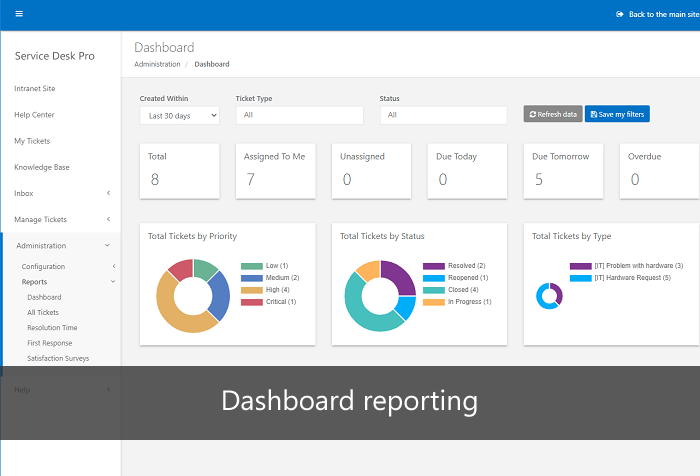
Data visualization dashboard
Multiple assignees for ticket
Ticket followers (CC Notification)
Service Level Agreement (SLA) management
Creating a ticket from e-mail (via Power Automate)
Tickets import from MS Excel spreadsheet
Advanced form options (conditional visibility, private comments, etc)
Custom views with custom columns (data tables)
Populate the choice field options from external SharePoint list
Advanced (rules based) ticket auto-assignment
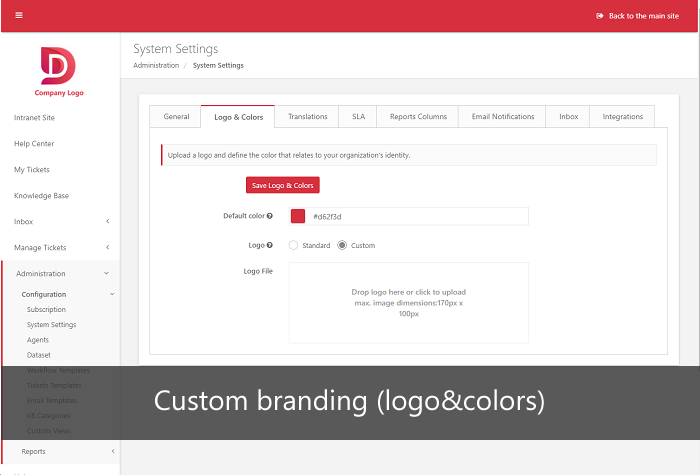
Custom branding (color theme)
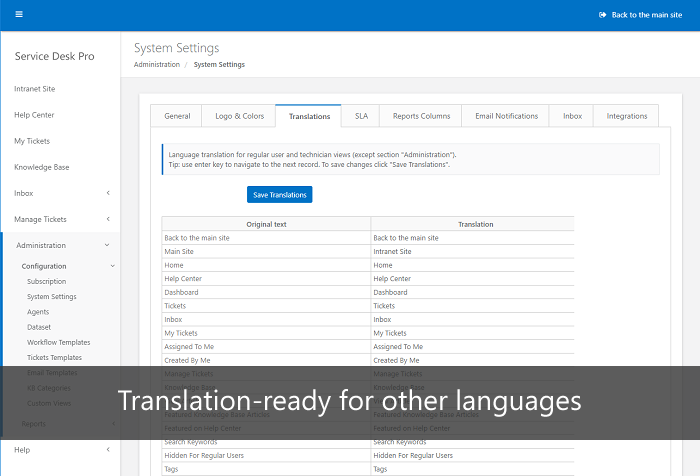
Language translations
Modern SharePoint UI

Customizable workflows

Service Desk Pro contains two predefined ticket workflows: standard help desk workflow and help desk workflow with pre-approval.
You can customize existing workflows or create a new one. Workflow editor makes it easy to design custom, no-code workflows by
using an intuitive interface. Workflow customization allows ensuring full compliance with business processes in the organization.


Integrations

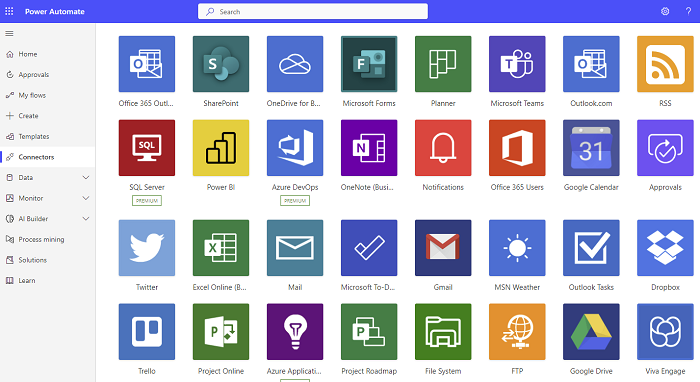
When you enable integrated list, tickets are automatically exported to the native SharePoint list on the parent SharePoint Site. Sharepoint list can be integrated with numerous other systems via Power Automate (previously MS Flow), used as a data source for Power BI (reporting services) or displayed on different site via Web Part. Click here for more information.
integrations

User Roles

Service Desk Pro offers four predefined user roles:

  • Regular user - can submit a ticket and sees only own data
  • Agent with Contributor role - can manage only assigned tickets under the "Manage Tickets" section
  • Agent with Technician role - can manage all tickets created from assigned templates under the "Manage Tickets" section.
  • Agent with Administrator role - can manage tickets created from assigned templates under the "Manage Tickets" section and all tickets under "Administration" section

Quick steps to start using Service Desk Pro

Support

If you have any question or issues, please email us at

Please read the below Product FAQ and General Troubleshooting FAQ before sending email with an technical question.

Product FAQ - General

  • Where app data is stored?

  • Do you have a user guide?

    Yes, you can download User Guide by using this link.

  • How to install the trial version on the SharePoint Site?

  • How to pin an app to the SharePoint menu, MS Teams, or Office 365 app launcher?

    After successful installation, the app is located on the SharePoint Site Contents.
    First, please use one of below methods to get an app shortcut.
    Method 1) Enter the app (first page) and copy full URL from the browser's address bar (with all parameters like SPHostUrl etc.), below is example:
    https://iverodemo-c5948d2992c3d6.sharepoint.com/ServiceDeskPro/pages/index.html?SPHostUrl=https%3A%2F%2Fiverodemo%2Esharepoint....

    Method 2) Enter the app (first page), copy URL from the browser's address bar and remove all characters after app name, below is example:
    https://iverodemo-c5948d2992c3d6.sharepoint.com/ServiceDeskPro/pages/index.html?SPHostUrl=https%3A%2F%2Fiverodemo%2Esharepoint....
    Required parameters will be automatically added by SharePoint.

    Pin app to the SharePoint Site menu

    Step 1) Go to the SharePoint Site
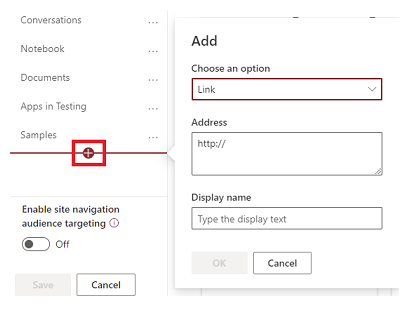
    Step 2) Click "Edit" on left or top SharePoint menu and add link to the app
    Details are described in this document, steps are different depends on the SharePoint UI type (classic view/modern view)
    PinApp3

    Pin app to MS Teams as a new tab

    Step 1) Open MS Teams
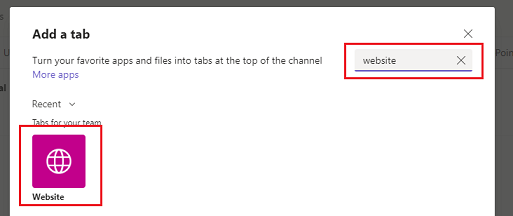
    Step 2) Click "+" icon to add a new tab
    PinMSTeams1

    Step 3) Type 'website' in the search box to find an item "Website"
    PinMSTeams2

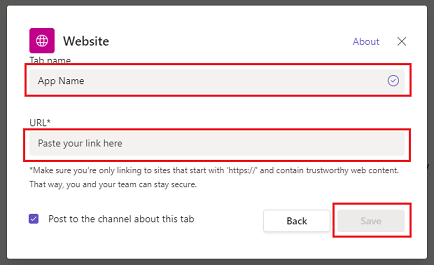
    Step 4) Enter tab name, copy&paste above app URL (Method 1 or 2) and click Save button
    PinMSTeams3


    Pin app to the Office 365 app launcher

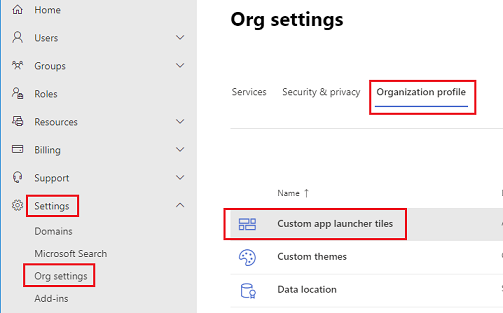
    You can add custom tile to the app launcher under Office 365 Admin Center->Settings->Organization profile page.
    PinApp4

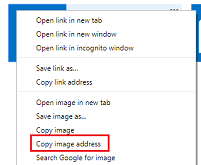
    Details are described in this document. To get logo URL required to create new tile on app launcher you can click right mouse button on app icon (SharePoint Site Contents) and select "Copy image address"
    PinApp5

  • How to customize the logo and colors?

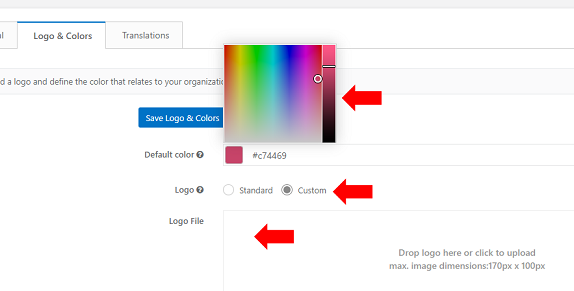
    You can custom brand your logo and color under Administration->Configuration->System Settings->tab "Logo&Colors".
    To upload own logo you need to:
    a) switch setting "Logo" to the value "Custom"
    b) click on area "Logo File" (or use drag&drop) to upload logo file.
    c) click on button "Save Logo&Colors"

    To change blue theme to another you need to click on color picker (setting "Default color"), select your color and click on the button "Save Logo&Colors".

    Change theme

  • How to translate an app into different languages?

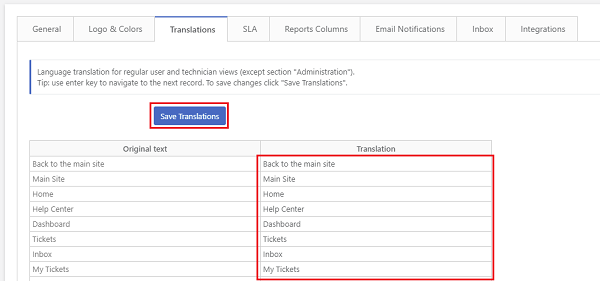
    You can translate an app under Administration->Configuration->System Settings-tab "Translations".
    Translations
    Language translation is available for regular user and manager views (except section "Administration").

  • How does subscription work?

    To get more information about subscription and payments please read Billing & Payments FAQ

  • How to update SharePoint app?

    App update process is described here and also on our Technical FAQ, question "How to update SharePoint app?"

  • I cannot find a user in drop-down list

    User list is pulled from SharePoint User Information List (built-in SharePoint feature, here is more info)
    SharePoint user is added to the User Information List after first login to the SharePoint Site.
    After first login, user will be visible in the user's drop-down list.

  • How to export data to MS Excel/CSV/PDF ?

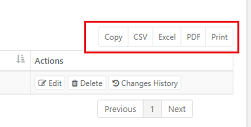
    Table export is supported for all the objects in the app (columns displayed in data tables). To export or print data, click the proper button in the top-right corner, above the data table.
    Table export

    Additionally, there is full ticket export to MS Excel (all standard fields + custom fields.)
    Full export

  • How to import tickets from another system ?

    The app allows import ticket import from MS Excel spreadsheet.
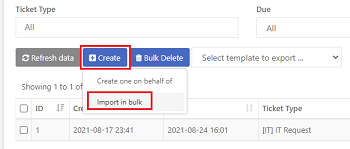
    To import tickets, click the button "Import in bulk" under Administration->Reports->All Tickets.
    Ticket import

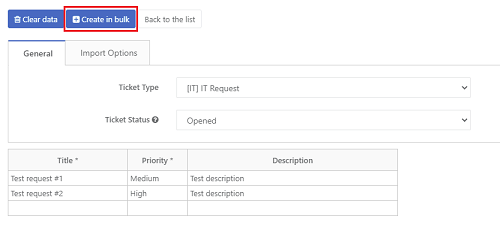
    First, you need to select Ticket Type and Ticket Prority from the list.
    Records to import must be copied from MS Excel by using Ctrl+C (copy to clipboard), then you need to select the first cell in the sheet and use Ctrl+V (paste from clipboard).
    When data is ready to import, click the button "Create in bulk"
    Ticket import

  • How to dynamically populate the custom Choice Field options from the external SharePoint list?

    The app allows for creating custom fields for ticket form. One of the custom field types is "Choice from External SharePoint List" which allows to dynamically populate the Choice Field options from the external SharePoint list on the parent SharePoint Site.
    To configure this type of field, you need to change the "Type" field to the value "Choice from External SharePoint List", afterward select list name from the drop-down and enter column name from which app will get data.

    External list

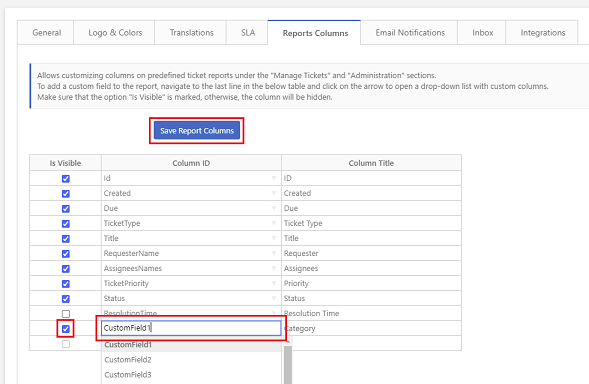
  • How to add custom columns to data table ?

    The app allows adding a custom form field to the agent reports that shows all tickets.
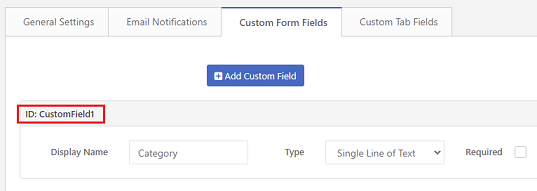
    Step 1) Go to Administration->Configuration->Ticket Templates->Edit->tab "Custom Form Fields" to check what is "ID" of custom form field (e.g. CustomField1)
    Custom column 1

    Step 2) Go to Administration->Configuration->System Settings->tab "Report Columns", click on empty row at the bottom of the data table and select custom field from the drop-down list. Make sure that the column "Is Visible" is marked.
    Custom column 2

    Step 3) Click button "Save Report Columns" to save changes.