TimeSheet Plus is timesheet tracking software for SharePoint on-premises that automates the collection, approval, and reporting of employee work. Since June 2024, this product has been unavailable on SharePoint Online.
- Fully Functional Trial: Explore all the features with a no-credit-card-required trial.
- Secure Data Storage: All your data is stored on your SharePoint tenant.
- Simple Pricing Model: sold as lifetime license for unlimited users (one-time fee, not per user, not per year).
- Free Updates & Support: Stay up-to-date with the latest updates and receive free expert support.

Key Features
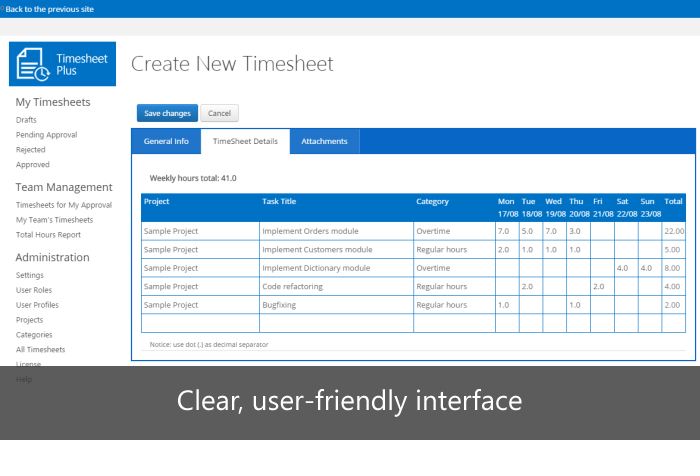
- Excel-like interface for viewing and working with timesheet data
- Customizable timesheet period: weekly, bi-weekly, semi-monthly or monthly
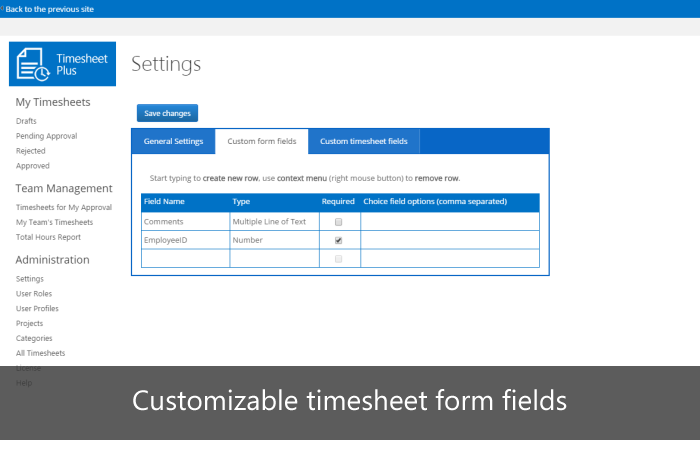
- Customizable form fields (supports numerous field types, such as Text, Choice, Number etc.)
- Customizable approval process (i.e. auto-approved, 2-level approval)
- Access management (three levels of users: Employees, Administrators, and Managers)
- Ability to track actual project task costs
- Automatic e-mail notifications of approvals and rejections
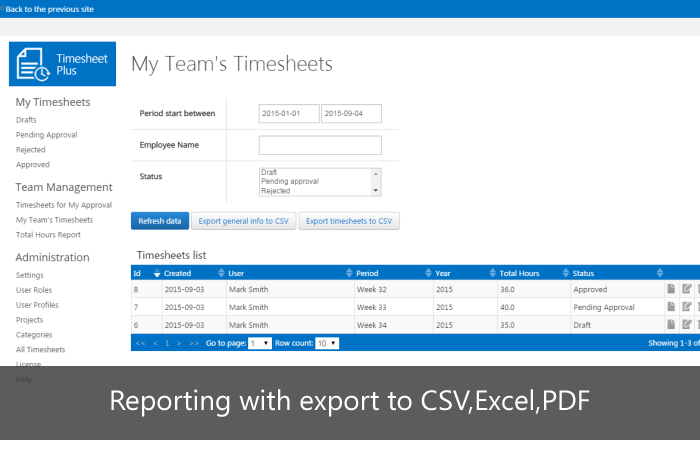
- Ability to export selected requests to CSV,Excel,Word and PDF format
- Team management (Managers can only see timesheets created by their subordinates)
- Ability to add multiple attachments to a timesheet
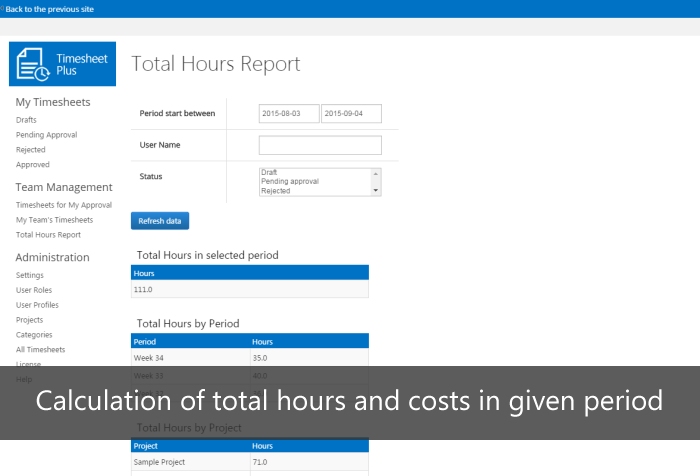
- Reporting functionality shows total hours and costs by project, employee or period
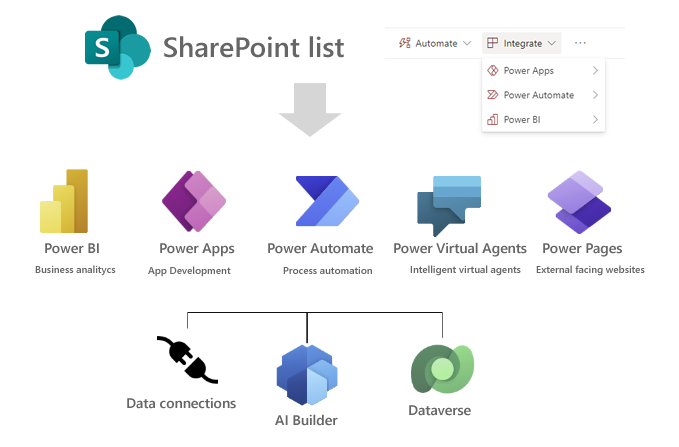
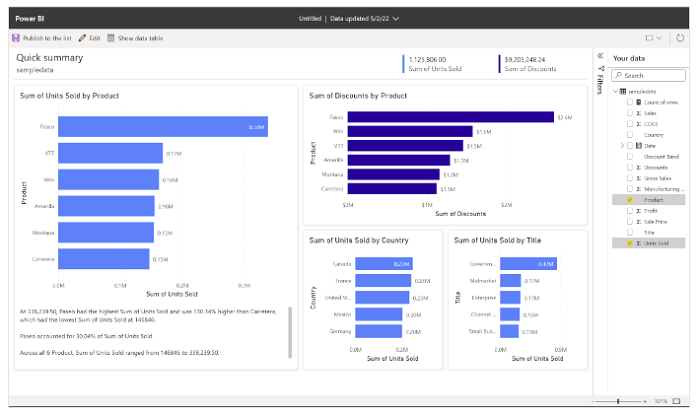
- Can be integrated with many systems via Power Automate
Integrations

Do you need more advanced features?
If you need more advanced features you can consider Work Time Pro app. Work Time Pro is a new generation of our time-off and timesheet apps.
Work Time Pro can work as a standalone timesheet management tool or timesheet management integrated with time-off. Below is a table with products comparison.
| Area | Feature | Work Time Pro | Timesheet Plus |
|---|---|---|---|
| General | User roles & team management | ||
| General | Built-in e-mail notifications with templates | ||
| General | 2-level approval workflow | ||
| General | Substitute approvers | ||
| General | Reporting with export to Excel | ||
| General | Attachments | ||
| General | Integration module | ||
| General | Optional time-off module | ||
| General | Modern SharePoint UI | ||
| General | Multi-level approval workflow | ||
| General | Advanced, role-based email notifications | ||
| General | Custom branding (color theme) | ||
| General | Language translations | ||
| General | Tracking changes history | ||
| General | Custom fields for "User" object | ||
| General | Assigning user to more than 1 team | ||
| General | Assigning 2nd line Manager to user | ||
| General | Populate the choice field options from external list | ||
| Timesheets | Timesheet tracking | ||
| Timesheets | Custom timesheet fields | ||
| Timesheets | Tracking projects & costs | ||
| Timesheets | Visual dashboard | ||
| Timesheets | Approval path based on projects and Project Manager | ||
| Timesheets | Project-specific tasks | ||
| Timesheets | Custom project fields | ||
| Timesheets | Calculating overtime&break hours | ||
| Timesheets | Calculating hours base on start/end time | ||
| Timesheets | Adding a comment for each timesheet cell | ||
| Timesheets | Copying data from the previous timesheet | ||
| Timesheets | Option "Required" for custom timesheet fields |
Why Us
Customers worldwide
Years on the market
Countries with businesses using our apps
Our apps are distinguished by a beautiful and clear user interface — a quality recognized by Microsoft when we won the prestigious Office 365 App Award (2015 edition) for Best User Interface.

Contact Us
Product FAQ
After successful installation, the app is located on the SharePoint Site Contents.
First, please use one of below methods to get an app shortcut.
Method 1) Enter the app (first page) and copy full URL from the browser's address bar (with all parameters like SPHostUrl etc.), below is example:
https://iverodemo-c5948d2992c3d6.sharepoint.com/TimesheetPlus/Pages/Default.aspx?SPHostUrl=https%3A%2F%2Fiverodemo%2Esharepoint....
Method 2) Enter the app (first page), copy URL from the browser's address bar and remove all characters after app name, below is example:
https://iverodemo-c5948d2992c3d6.sharepoint.com/TimesheetPlus/Pages/Default.aspx?SPHostUrl=https%3A%2F%2Fiverodemo%2Esharepoint....
Required parameters will be automatically added by SharePoint.
Pin app to the SharePoint Site menu
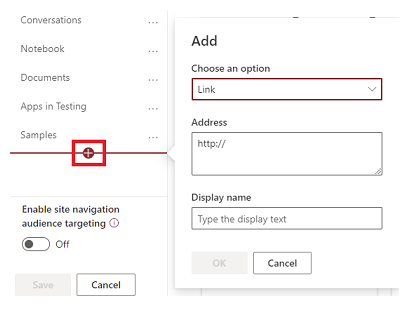
Step 1) Go to the SharePoint SiteStep 2) Click "Edit" on left or top SharePoint menu and add link to the app
Details are described in this document, steps are different depends on the SharePoint UI type (classic view/modern view)
Pin app to MS Teams as a new tab
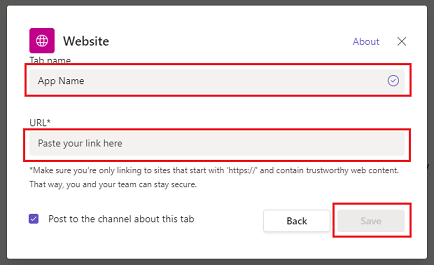
Step 1) Open MS TeamsStep 2) Click "+" icon to add a new tab

Step 3) Type 'website' in the search box to find an item "Website"
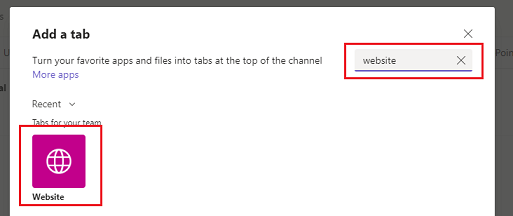
Step 4) Enter tab name, copy&paste above app URL (Method 1 or 2) and click Save button
Pin app to the Office 365 app launcher
You can add custom tile to the app launcher under Office 365 Admin Center->Settings->Organization profile page.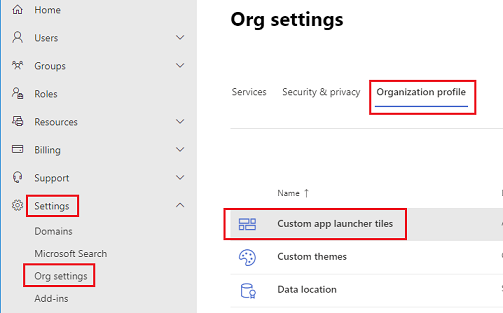
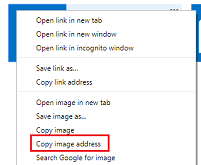
Details are described in this document. To get logo URL required to create new tile on app launcher you can click right mouse button on app icon (SharePoint Site Contents) and select "Copy image address"
App is 100% SharePoint-hosted - all data is stored securely on the customer's SharePoint environment.
App's data is never leaving your SharePoint env, we don't have access to your data and we never see it.
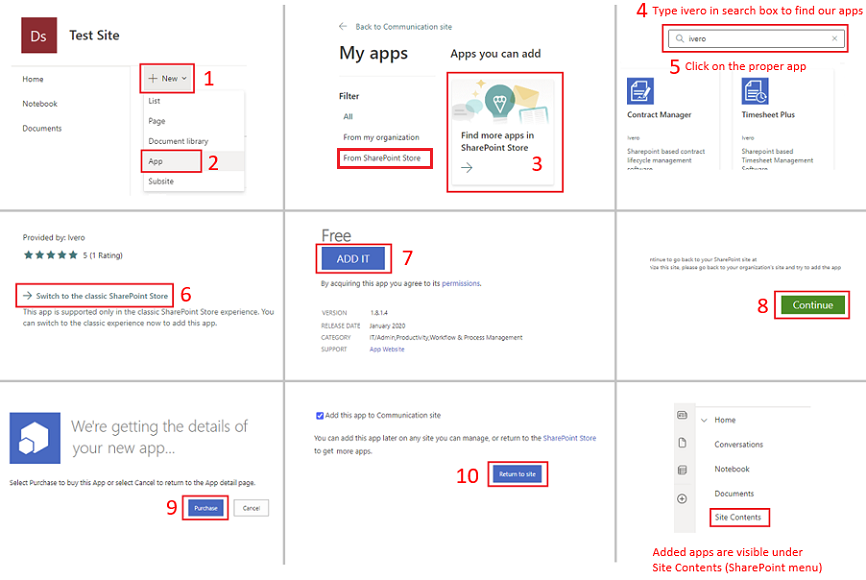
You can download the fully functional trial version from the SharePoint Store, which is explained step by step in the above illustration.
If you have problems with app installation, please read the question "I cannot install SharePoint app on my SharePoint Site" from our Technical FAQ.
The TimeSheet Plus workflow consists of four states: Pending Approval, Approved, Rejected and Cancelled.
Please see below step by step guide to completing the approval process.
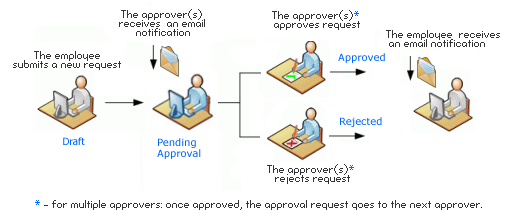
1. A user creates a new timesheet.
2. The user submits the timesheet for approval ("Send to approve" button).
3. Before timesheet is approved by an approver, the user can make changes to the timesheet.
4. The approver(s) receives an email notification of the request.
5. The approver(s) approves or declines the approval request.
6. The user receives an email notification of request status (approved or rejected).
7. If the approver(s) approves the request, the process is completed.
8. If the approver(s) rejects the request, the user must edit and resubmit the request, until the approver(s) gives final approval.
The app offers three predefined user roles: Regular user, Manager, and Administrator. .
Each user role has the following permissions.
Actions available to regular employees:
• Create, edit and submit timesheet for approval
• View own timesheets
Actions available to managers:
All actions of regular employees plus:
• Approve or reject timesheets waiting for approval*
• View all the timesheets of subordinates
• Edit and delete approved timesheets
Actions available to administrators:
• Customize system settings
• Assign user roles and user profiles
• Define dictionaries (projects,categories)
• View all the timesheets
* - depends on system settings
App update process is described here and also on our Technical FAQ, question "How to update SharePoint app?"
User list is pulled from SharePoint User Information List (built-in SharePoint feature, here is more info)
SharePoint user is added to the User Information List after first login to the SharePoint Site.
After first login, user will be visible in the user's drop-down list.
1. Configure settings (section Administration->Settings) :
• General Settings tab
• Custom form fields tab
• Custom timesheet fields tab
2. Assign user roles: Manager and Administrator (section Administration->User Roles ). There is no need to assign regular User role, because this role is given by default -every user with access to the Sharepoint parent site (where the app is installed) also has access to this app as regular user.
3. Create user profiles (section Administration->User Profiles )
4. Create or edit projects (section Administration->Projects)
5. Create or edit categories (optional) (section Administration->Categories)
As Regular User:
1. Click "Create new" tile on the main page and submit request.
If you need help with configuration, please watch video guide
We cannot extend trial period remotely, because app is SharePoint-hosted and our company doesn't have access to the customer's SharePoint env., however you can uninstall an app and install it again to "reset" 14-day period. (this operation removes all app data and configuration).
Flextime is a flexible hours schedule that allows workers to alter workday start and finish times.
Step 1) Go to Administration->Settings, setup "Date fields mode" to "On-demand" and click Save

Step 2) Go to Administration->Settings, select "Custom timesheet fields" tab, define custom columns "Start Time","End Time" and click Save
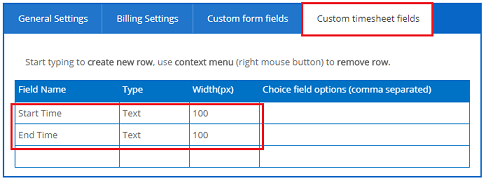
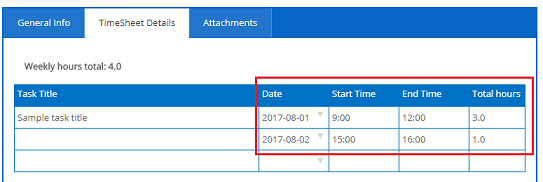
Now user can enter working hours for each day
Go to Administration->Settings, select "Billing Settings" tab, enable billing options and click Save
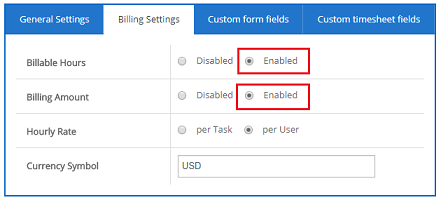
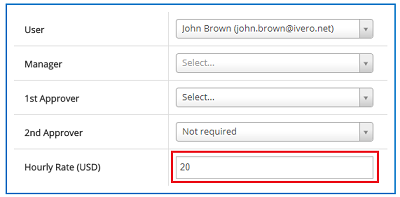
Optionally you can define hourly rate per user
Now user can report billable hours

Go to Team Management->My Team's Timesheets or Administration->All Timesheets and click Export button

You can enable integrations features and use Power Automate to integrate with 3rd party systems.
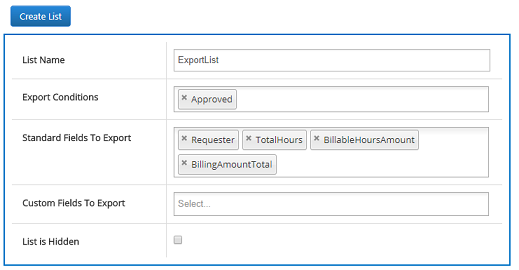
Let say that you would like to export total working hours and billing amount to the external system (i.e. Slack,Oracle,SQL Server etc) when request has been approved.
First, go to Administration->Integrations and create integration list. Select "Approved" as export trigger and proper standard fields to export
Afterward, you can use Power Automate trigger "Sharepoint - when an item is created" to call any kind of connector/action.
Here is a list of example integrations.
Step 1) Go to Administration->Settings, select "App Logo" as "Custom" and click Save

Step 2) Go to Administration->Settings, click "Upload"->Choose file and then Save

