Admin Guide
Welcome to the Approvals Hub Admin Guide!
This guide is designed to help administrators configure Approvals Hub effectively.
It walks you through essential setup steps and provides guidance on optional configurations
to customize the app for your organization’s needs.
Before diving into the configuration, we recommend reviewing the
Overview,
Core Concepts
and Key Features
sections. These resources provide a foundational understanding of how the app works and its capabilities.
Installation
To install and configure the app, refer to the app installation guide for detailed instructions. The guide covers:
- Installation from the SharePoint Store – How to install the app in your SharePoint tenant.
- Adding the App to a SharePoint Page – Steps to install the app on a SharePoint site .
- Adding the App to Microsoft Teams – Instructions for integrating the app into Microsoft Teams for better collaboration.
Follow the installation guide to ensure the app is properly set up in your environment.
Configuration
Admin Video Guide
Quick step-by-step tutorial to help administrators configure the app
Watch the video guide for administrators
Getting Started with Sample Templates
Admin Video Guide
Quick step-by-step tutorial to help administrators configure the app
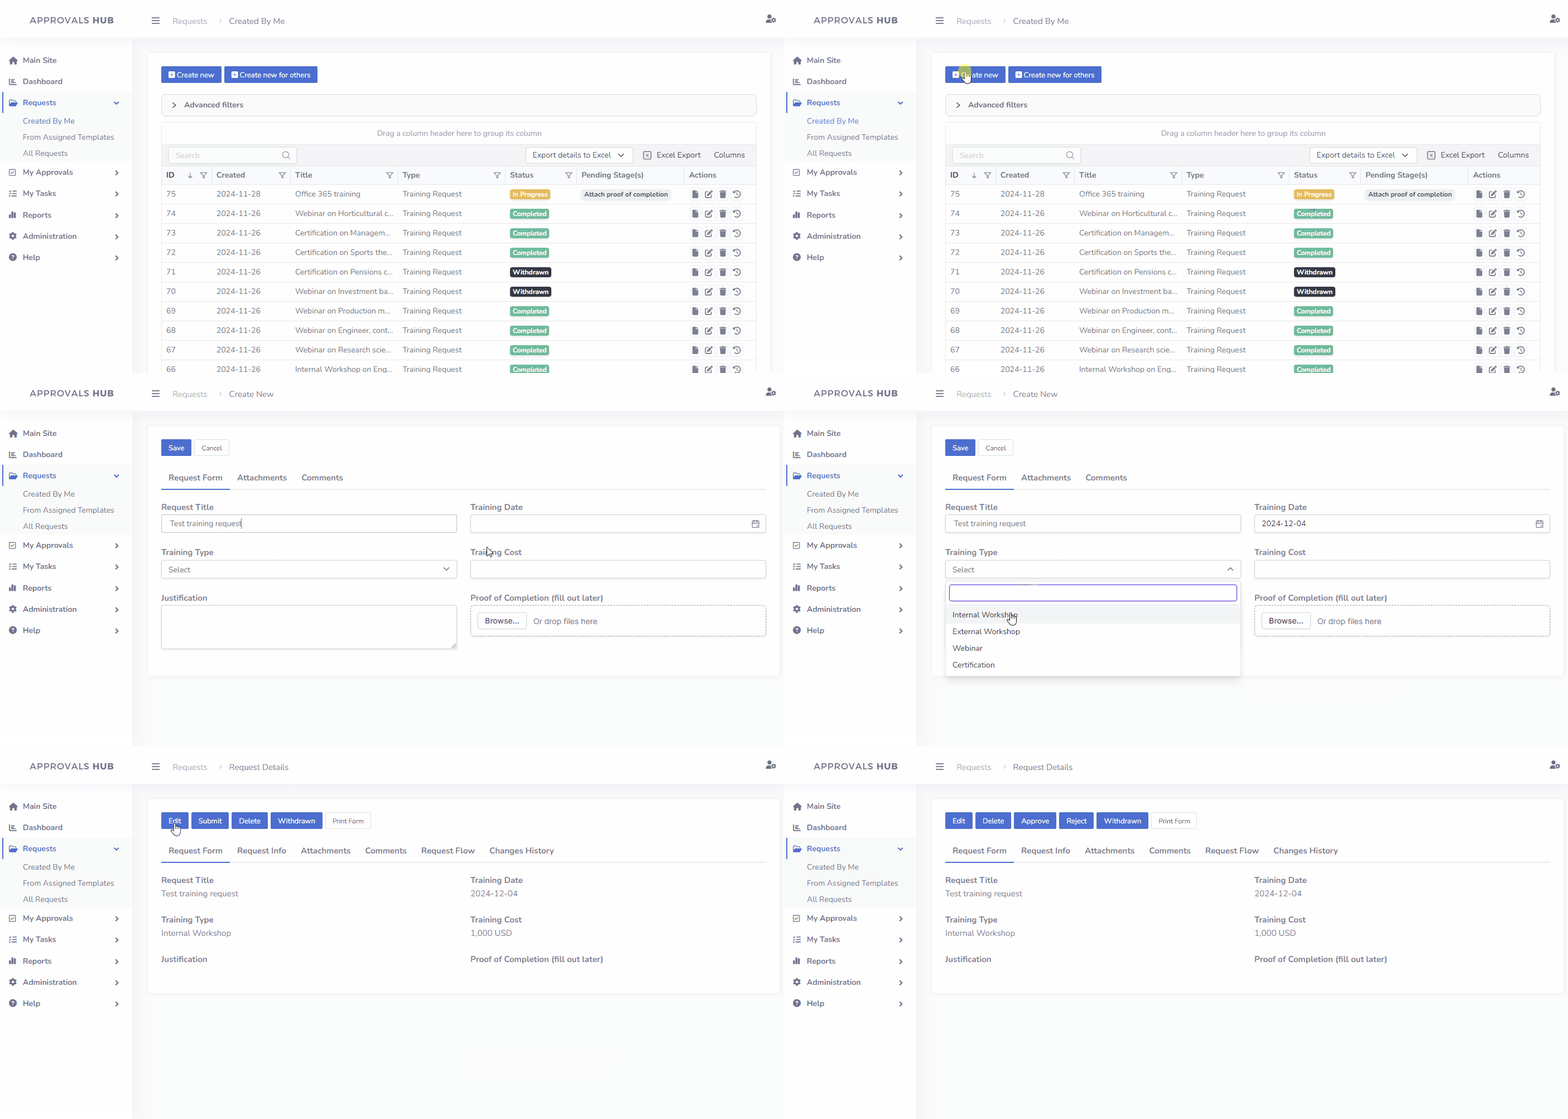
When the app is installed, it includes two sample request templates "Sample Training Request"
and "Sample Mileage Reimbursement" designed to help you test and familiarize yourself with its features without any initial configuration.
However, for operational use in your organization (production usage), these templates should be customized, or removed to better align with your specific processes.

Essential Setup Steps
Step 1: Configure General Settings (Administration->Settings)
-
Tab: General Settings
Adjust global settings such as date formats, default currencies, and other app-wide preferences.
Learn more about General Settings
-
Tab: Logo & Colors
Customize the app's logo and color scheme to align with your brand identity.
Learn more about Logo & Colors
-
Tabs: Reports Permission & Report Permissions
Define and manage access to reports and request data.
Learn more about Reports Permission
Step 2: Create Users (Administration->Users)
Adjust global settings such as date formats, default currencies, and other app-wide preferences.
Learn more about General Settings
Customize the app's logo and color scheme to align with your brand identity.
Learn more about Logo & Colors
Define and manage access to reports and request data.
Learn more about Reports Permission
Set up users under Administration -> Users to enable individual access to the app.
Learn more about User Management
Note:
- Users configuration steps may vary based on your chosen features. For instance, if Department Tracking or Office Location Tracking is enabled, you'll need to populate the Department and Office Location dictionaries under Administration -> Dictionaries or fill out 'Department' and 'Office Location' under Microsoft 365 User Profile
- For large organizations using the 'unlimited users' subscription plan, there is an option to set up automatic provisioning for regular users, here is more info.
Step 3: Configure Request Templates (Administration->Request Templates)
Customize or create new templates under Administration -> Request Templates to meet your organization's requirements.
Learn more about Request Templates
Optional Configuration Steps
-
Bulk Data Import: The app supports bulk import of requests, users, and datasets from MS Excel spreadsheets.
Learn more about Bulk Data Import -
Email Notifications&Reminders:The app supports email notifications and reminders to enhance your workflow. To enable these features, you need to set up Power Automate flows.
Learn more about configuring Email Notifications
Learn more about configuring Email Reminders -
User Groups: Organize users into groups to simplify permissions management.
Learn more about User Groups -
Budgets: Set up budgets to track and manage expenses effectively.
Learn more about Budgets -
Custom Views: Create tailored views to display relevant request data.
Learn more about Custom Views -
Delegates: The ability to assign approval responsibilities to others during absences.
Learn more about Delegates -
Integrations: Implement custom integrations or reports by using Power Automate or Power BI.
Learn more about integrations